I’d like to think of it as a desert, dark chocolate brownie
with a single scoop of vanilla bean ice-cream, yumm!! Oh yes, back to this blog
post:( now.
Contouring creates
shadows on the face; this illusion helps to recede back the facial plains of
your choice. Think of it as less emphasis, like shrinking an enlarged
forehead, camouflaging a double chin, facial jowls (pun not intended), give
more structure to the cheekbones and a slimmer nose to name just a few.
For the how to: video, I’ve used a Kohl Kajal Pencil meant
for the eyes, in a deep cool tone brown (140 Chocwaves) shade from Catrice
Cosmetics. Surprisingly, it’s creamy texture made blending easy, not at all
what I had expected for an eye product under SGD 5!! It worked for me and I hope
it does for you too.
The ideal shade for contouring is usually a cool under toned
product, 2-3 shades darker than your complexion. Think along the lines of milk
chocolate, a gradient of charcoal grey, greys, beige, off white shades. It
shouldn’t have any orange and red undertones as it won’t work to create
shadows.
One other thing to consider when wanting to contour is to
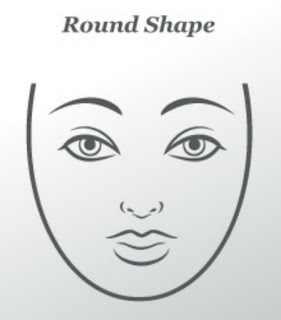
identify your face shape. I have an oval face shape with rounded cheeks and I
prefer the contouring techniques for a round face shape. There is no hard fast
rule, what works for me may not work for you. Have fun, it’s just makeup!
Let's talk about Highlighting, real quick!!
For the past 2 weeks, I have been gravitating towards more
gold based highlighters for my medium complexion of yellow undertones. Clearly
i am not over JLo’s and the makeup she had on for the recent Golden Globe
Awards. It looks more natural and lends a radiant healthy beam from within.
Again, take your time to experiment.
To contour a round-face shape:
Place the contour shades onto the temples, sides of the
forehead. Go with a little at a time and take your time to blend the contour
shade in, take a step from the mirror and assess how it looks. If you would
like to narrow down the forehead, sweep the contour along the hair line and
blend it downwards.
If you have trouble locating the hollows beneath the
cheekbones, roll a brush from the outer corner of your eyes till you feel and
see the dip. Place the contour shade from the top of the ears to the midst of
your cheeks and blend the contour upwards, moving back towards the
hairline.
I have a wide nose, to minimize the appearance of the
widened nostrils. I like to contour my nose along the sides of my nostrils in a
triangular shape. I also like contour the sides on the bridge of my nose whenever
I want to have a lifted look. This lends an illusion of a heightened nose.
Contouring the lower face gives it structure and shape with
a slimmer appearance, the same can be done to the sides of the neckline and
carving out those sexy collarbones like Deepika Padukone.
Depending on the texture of the contour product used, choose
a brush that helps to blend the product evenly out on your face. Select a brush
in a size that best suits your facial contours to avoid moving the contours
around.
I enjoy using my duo-fibre brush to gently blend away the
demarcation lines and then go in with a bigger fluffier brush to soften out the
contour, highlight and bronzer. After all that blending, if I find that the
contour has moved slightly southwards, I go in with my loose powder to help
clean up the area beneath my cheekbones. This helps the contour to stay put and
looks crisp.
I do the baking method for about 2mins or so while I tune in
to some party music and groove around. Then go straight back in, to knock the
excess powder off.
As always I hope this post was useful. If you’d like to see me in action and how I
contour, hop on over to my YouTube channel at www.YouTube.com/user/TheLeiaV
For weekly videos, please subscribe to my channel to be notified when new content goes up on my channel. I post video once a week over the weekend and would love you to join my small internet family.
Have a lovely weekend ahead!
Love
Shanthi A Vimalan


No comments
Post a Comment
If there are any video requests for me, please drop me a message below. Thank You!!